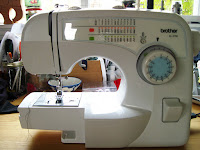
My sewing machine and I pushed limits I did not know existed! We sewed past the hours of sunshine and worked into the wee hours of the evening... We pressed on and on with our friend the iron and sewed till we could sew no more.
Okay, so that's a bit of an enrichment of the actual story... ahem.
But really, this was a challenging pattern the got me just a bit frustrated at times. I tried to find other reviews of the pattern online, but the only posts I found were ones of frustration. Broken needles. Snapped threads. One blogger even almost threw the handles away until she was saved by a friend. Really, sounds like a horror story to me, and yet I thought this was the perfect bag for my swap partner, so I persisited.
The pattern is from Amy Butler's book Amy Butler's Style Stitches: 12 Easy Ways to 26 Wonderful Bags. It is the Miss Maven Ruffled Handbag. Sounds friendly enough, eh?
Let me interject here with this fact:
I in no way consider myself and Experienced seamstress as the pattern calls for. I just didn't think the bag looked all that hard. And I like a challenge.
Well, to start, I have never cut out so many pattern pieces in my life. Main panels, interior panels, handles, pockets, cell pocket, tabs, and all with interfacing. Yikes. At least 30 pieces.
Since other bloggers cited the handles as being the nightmare, I though I would start with those first. Yup. Get the dirty stuff out of the way first. Well, let me say, the instructions, though very polite ("Please set the exterior aside for now"), were not all the great. Maybe that's just me though as I like a good visual to help me along. The book only had sketched diagrams and they were not all that helpful when it came to the handles.
I did what the instructions told me and then I wondered how in the hang these were supposed to look good! I did not take a pic of the 'finished as per instruction' handles because I was too impatient to make them look a good finished. But believe me when I say that the inside curves were not at all pretty. So I took matters into my own hands and made and added bias tape to the curves. And though the corners are still a little wonked, overall, they look waaaaaay better.
Now that the 'hard' part was over, I went on to the easy part. The next problem people seemed to have with the bag was the ruffle. I don't get that problem, because that was probably one of the easiest parts for me. I have some ruffle experience, you know, pulling threads and all to get a good ruffle, and I did not snap any threads. One trick I did do when attaching the ruffle was using a twin needle so my stitching was even and I was done in one shot. I did have to take it slow through the ruffle because of all the bunched fabric, otherwise I may have had a broken needle. Since I have to travel about an hour to get a new twin needle, the few I have are very precious to me and I take very good care of my precious twins.
Then it was on to bigger things. The construction of the whole.
This went fairly well, though because of the fused fleece and the layers of fabric, this was a little frustrating. I almost needed a long arm sewing machine to get this all together. Really. It's true.
Anyway, at one point, the point at which the handles were attached, the pockets were in place, and I had only to sew the top together, the bag looked like this:
Pretty, eh?
But it worked. I got the bag all together and then it was time to topstitch and add the tabs with the magnetic snaps. That was the point I nearly quit. Bah.
No worries, though. Little D helped by showing me that it was all okay because we recycle. She lined up the cans from the recycle bag for me to show me, well, I really don't know what. Because it really didn't help me with top-stitching.
Um, yeah, that's my sewing space. Small, cramped, and rather unorganized. I need a room for my hobby.
Anyway, 2 days toil and this is the end result.
Ta da!
Was it worth all the effort? I don't know. We'll have to see what my partner thinks when she gets it.
Secret swap, so I am not showing the inside or telling any real details about it since that might give it away.
Overall, definitely a difficult pattern, but not impossible.


Hello there, popping over from Mommy by day. I LOVE your bag! Infact I think it is the best out of the 100 odd entries. The colour combination too is very attractive. All the Best!
ReplyDeleteWell worth the effort, I'd say. I love the fabric combination of the black and white circles teamed with red... striking.
ReplyDeleteBeautiful end result - must make up for all the issues. I like your colour combinations.
ReplyDeleteI have to say I've heard a lot of grumblings about Amy Butler bag patterns - the instructions aren't always clear, can be overly complicated and generally people struggle with them. That has always put me off trying her designs .... her fabric, though, is lovely.
Wow, it turned out just fabulous. I've never done an Amy Butler pattern myself, but it seems like everybody says the same thing about them—terrible instructions, wonderful finished result (if you can manage the instructions, that is). Your black and red color combination really is amazing!
ReplyDeleteReally pretty! Love the ruffle down the middle.
ReplyDelete